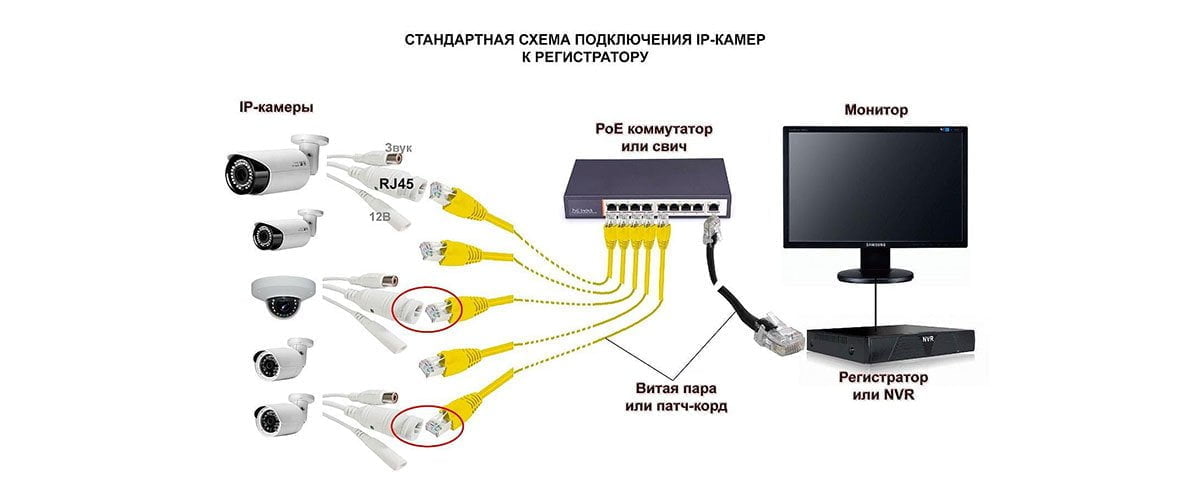
Selecting the appropriate connection type To connect an IP camera to a computer, you can use several connection types: wired, wireless or mixed. A wired connection is preferable if the camera is located near the computer. In this case, you can use a network cable to connect the devices. Wireless connection can be a convenient option if the camera is in another room or even in another building. To do this, you need to use a Wi-Fi adapter and set up a wireless network. A mixed connection can be used if the camera is located close to the computer, but a wired connection is not possible. In this case, you can use a Wi-Fi adapter as a bridge between the camera and the computer. The choice of connection type depends on specific conditions and requirements. Before purchasing an IP camera, you need to evaluate which type of connection is most suitable for your specific situation.
Wi-Fi connection
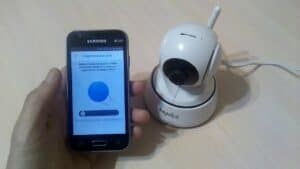
If your IP camera supports Wi-Fi, then you can connect it to your computer via Wi-Fi. To do this you need to do the following:
1. Turn on Wi-Fi on your IP camera and computer.
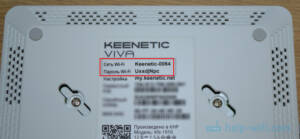
2. Set up Wi-Fi on your IP camera by entering the network name and password.
3. Set up Wi-Fi on your computer, find the network name of your IP camera and enter the password.
4. Check if your IP camera is connected to the Wi-Fi network, open your browser and enter your camera's IP address in the address bar.
5. If everything is configured correctly, you should see an image from your IP camera.
Remember that if you connect an IP camera to a computer via Wi-Fi, you must ensure a stable and fast connection, otherwise the image may be unstable or even disappear altogether.
Step 1: Connecting the cable or setting up Wi-Fi
Before you start connecting the IP camera to your computer, you need to decide on the connection method. If you have an Ethernet cable at your disposal, then you need to connect it to the IP camera and computer. If you want to use a wireless connection, then you need to configure Wi-Fi on the IP camera and make sure that your computer has a Wi-Fi module and is connected to the same network.
To connect via an Ethernet cable, you must perform the following steps:
- Connect the Ethernet cable to the IP camera and computer.
- Make sure the IP camera is turned on.
- On your computer, open a browser and enter the camera's IP address (this address can be found in the user manual).
- Enter your username and password (also listed in the user manual).
- Make the necessary settings and save them.
If you want to use a Wi-Fi connection, you must follow these steps:
- Turn on the IP camera.
- Set up Wi-Fi on the IP camera (to do this, press the Wi-Fi button on the camera body and follow the instructions on the screen).
- On your computer, search for available Wi-Fi networks and connect to the network created by the IP camera.
- Open your browser and enter the camera's IP address (this address can be found in the user manual).
- Enter your username and password (also listed in the user manual).
- Make the necessary settings and save them.
Connecting an IP camera to a computer is quite simple if you follow these step-by-step instructions. However, if you have any problems, you can always consult the user manual or experts in the field.
Step 2: Installing Drivers and Software
Before you connect your IP camera to your computer, you need to make sure that you have all the necessary drivers and software. In most cases, drivers and software are included with the camera on a disc. If the disk is missing, you can download drivers and software from the manufacturer's website.
To install drivers and software, follow these steps:
- Insert the driver and software disc into your computer's drive.
- Run the installation file and follow the onscreen instructions.
- If the disk is missing, go to the manufacturer's website and download drivers and software.
- Unzip the downloaded files and run the installation file.
- Follow the onscreen instructions to complete the installation.
After installing the drivers and software, your IP camera is ready to connect to your computer.
Setting up an IP camera and checking the connection
Before you connect the IP camera to your computer, you need to configure it correctly. To do this, follow these steps:
- Connect the camera to the router using an Ethernet cable.
- Go into your router settings and find the IP address that was assigned to the camera. This can usually be done through the router's web interface.
- Go to the camera management page by entering its IP address in the browser.
- Set up the camera according to the instructions that come with the kit. This usually comes down to setting network parameters and a password.
After setting up the camera, you can check its connection to the computer. To do this, follow these steps:
- Open your browser and enter the camera's IP address into the address bar.
- If everything is configured correctly, the camera control page will open.
- If the page does not open, try rebooting the camera and router, and also check that the entered IP address is correct.
Correctly setting up and checking the connection of the IP camera to the computer will allow you to use it to monitor the object at any time.
Configuring Camera Settings
In order for your IP camera to work properly, you need to configure its settings correctly. First of all, you should make sure that you have access to the camera control interface. To do this, you will need to connect to the IP address that has been assigned to your camera.
Next, you need to configure your network settings. Typically, IP cameras use the DHCP protocol, which automatically assigns an IP address. If you want to use a static IP address, then you need to manually enter the network settings.
Additionally, you should adjust your video settings. Here you can choose the video format, resolution, frame rate and other settings that will allow you to get the best image quality.
Also, you can configure audio settings. If your camera supports audio recording, then you can select the recording format, sampling rate and other parameters.
Finally, you need to configure your security settings. Here you can set a password to access the camera control interface, as well as configure other security settings that will protect your camera from unauthorized access.
Overall, setting up your camera settings may take some time, but it is necessary to ensure that your IP camera performs at its best and provides maximum protection.
Checking the connection and viewing video from the camera
After you have connected the IP camera to your computer, you need to make sure that the connection was successful and the camera is working. To do this, you can use a special program for viewing video from the camera.
- Open your browser and enter the camera's IP address into the address bar. If you do not know the IP address of the camera, you can use a program to search for devices on the network.
- After entering the camera's IP address into the browser's address bar, the camera's web interface page will open. Here you can configure the camera settings and view the video.
- To view video from the camera, you need to find the corresponding button or link on the camera’s web interface page. Typically this is the 'Live View' or 'View Video' button.
- Click on the 'Live View' or 'View Video' button. A window will open with a video stream from the camera. If the video is not displayed or is displayed with errors, you need to check your camera settings and network connections.
Checking the connection and viewing the video from the camera are important steps when installing an IP camera on your computer. This will ensure that the connection is correct and the camera is operating correctly.
Read further:
