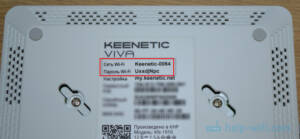
Step by step: how to change the name and password of a Wi-Fi router
If you want to change the name or password of your Wi-Fi router, it is very simple. In this article, we will tell you in detail how to do this. Step 1: Enter the router settings First, you need to enter the settings of your router. To do this, connect to the Internet and open your browser. In the address bar, enter the IP address of your router, press Enter and enter your username and password. If you don't know the router's IP address, you can find it on the back of the router. Step 2: Change the name and password After entering the router settings, find the "Wi-Fi" or "Wireless Network" section. There you will see a Network Name or SSID field where you can change the name of your Wi-Fi network. Also in this section, you will find a Password field where you can change the password to access your Wi-Fi network. Step 3: Save Changes Once you make the changes, don't forget to save them. Typically, this requires clicking on the “Save” or “Apply” button. After this, your router will reboot and the new settings will take effect. Now you know how to change the name and password of your Wi-Fi router. Don't forget that when changing your password, you must choose a strong password to protect your Wi-Fi network from unauthorized access.
Read further:


