- Step 1: Make sure your computer has Wi-Fi
- How to check for Wi-Fi on your computer
- Step 2: Turn on Wi-Fi on your computer
- How to turn on Wi-Fi on your computer
- Step 3: Find available Wi-Fi networks
- How to find available Wi-Fi networks on your computer
- Step 4: Connect to Wi-Fi
- How to connect to Wi-Fi on a computer
- Step 5: Check your connection
- How to check your Wi-Fi connection on your computer
- Tips for successfully connecting to Wi-Fi
Step 1: Make sure your computer has Wi-Fi
Before you start searching for a Wi-Fi network on your computer, make sure your computer has Wi-Fi. In some cases, your computer may not have built-in Wi-Fi, so you may need to buy a separate Wi-Fi adapter. If your computer has built-in Wi-Fi, make sure it is turned on. To do this, you may need to press the corresponding key on the keyboard or find the corresponding switch on the computer case. If you are using a laptop, then usually there is a button or combination of keys on the laptop case that turns the Wi-Fi module on and off. Once you are sure If your computer has Wi-Fi and it is turned on, you can start searching for available Wi-Fi networks and connect to the one you need.
How to check for Wi-Fi on your computer
If you want to connect to Wi-Fi but don't know if your computer has Wi-Fi, you can check in a few simple steps.
1. Open 'Control Panel' on your computer. This can be done by clicking on the 'Start' button and selecting 'Control Panel' from the menu.
2. Find the 'Network and Internet' section and select it.
3. Then select 'Network and Sharing Center' and click on it.
4. In the Network and Sharing Center, select 'Change adapter settings'.
5. If your computer has Wi-Fi, then you should see the Wi-Fi adapter in the list. If the Wi-Fi adapter is not listed, then your computer does not have Wi-Fi.
6. If you are sure that Wi-Fi is on your computer, then all you have to do is connect to the wireless network.
Knowing how to check for Wi-Fi on your computer, you can quickly and easily connect to a wireless network and enjoy high-speed Internet.
Step 2: Turn on Wi-Fi on your computer
To connect to Wi-Fi on your computer, you need to turn on Wi-Fi on the computer itself. This can be done in different ways, depending on your computer's operating system.
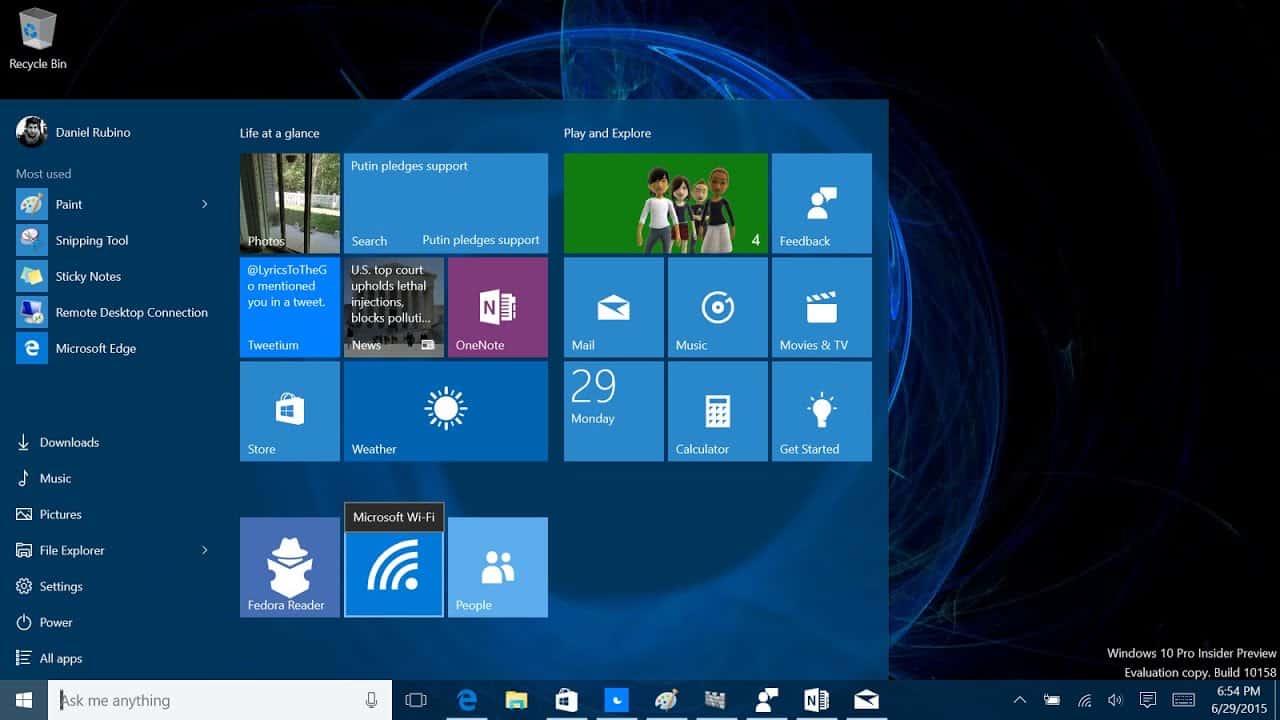
If you have Windows, then you need to find the Wi-Fi icon on the taskbar in the lower right corner of the screen. Click on it and select the 'Turn on Wi-Fi' option. If there is no Wi-Fi icon on the taskbar, then you need to click on the 'Start' icon, select 'Settings', then 'Network and Internet' and 'Wi-Fi'. There you will find the 'Enable Wi-Fi' option.
If you have a Mac, you need to find the Wi-Fi icon in the upper right corner of the screen. Click on it and select the 'Turn on Wi-Fi' option. If there is no Wi-Fi icon, then you need to go to the 'Apple' menu, select 'System Settings', then 'Network' and 'Wi-Fi'. There you will find the 'Enable Wi-Fi' option.
Once you have enabled Wi-Fi on your computer, the computer will automatically search for available Wi-Fi networks. Select the desired network and enter a password if required. After this, you will successfully connect to Wi-Fi on your computer.
Don't forget that Wi-Fi may be disabled on your router or modem. If you can't connect to Wi-Fi on your computer, make sure Wi-Fi is turned on on your router or modem.
How to turn on Wi-Fi on your computer
If you want to connect your computer to Wi-Fi, the first step is to turn on Wi-Fi on the computer itself. This may seem complicated, but it is actually very simple. Follow these simple steps:
- Open 'Control Panel' on your computer.
- Select 'Network and Internet'.
- Select 'Network and Sharing Center'.
- Select 'Change adapter settings'.
- Find your Wi-Fi adapter and right-click.
- Select 'Enable'.
If everything is done correctly, the Wi-Fi icon should appear in the lower right corner of your screen. Now you can connect to available Wi-Fi networks and enjoy high-speed Internet on your computer.
Step 3: Find available Wi-Fi networks
To connect to Wi-Fi, you need to find available networks. This can be done in a simple way:
1. Tap the Wi-Fi icon in the bottom right corner of the screen.
2. You will see a list of available Wi-Fi networks in your area.
3. Select the network you want to use and click on it.
4. Enter a password if required.
If you don't see any available networks, check that your Wi-Fi is turned on. If it is enabled, try moving closer to your router or restarting your computer.
Also make sure you are connected to the correct network. If you are not sure which network to use, contact the Wi-Fi owner.
Once you find an available network, you can connect to it and start using the Internet on your computer.
How to find available Wi-Fi networks on your computer
To connect to Wi-Fi, you must first find an available network. To do this, open the Wi-Fi menu on your computer. Typically, the Wi-Fi icon is located on the taskbar, at the bottom right of the screen. You can also open the Wi-Fi menu by clicking on the 'Start' icon and selecting 'Settings'.
When you open the Wi-Fi menu, you will see a list of available networks. If the network you need is not in the list, try refreshing the list by clicking the 'Refresh' button. If the network still doesn't appear, it may be hidden. In this case, you must know the network name and password to connect to it.
Select the network you need from the list and click on it. If the network is password protected, you will be prompted to enter it. After entering the password you will be connected to the network.
If you can't connect to the network, try restarting your router or your computer. If the problem persists, contact your Internet provider's technical support.
Now you know how to find available Wi-Fi networks on your computer and connect to them. Enjoy fast and uninterrupted Internet!
Step 4: Connect to Wi-Fi
Once you've found an available Wi-Fi network, it's time to connect to it. To do this, click on the network name and enter a password, if required.
If you have connected to this network before, your computer may automatically connect to it without prompting you for a password. However, if you notice that your network connection has been lost, you may have to re-enter your password.
Remember that when connecting to open Wi-Fi networks, such as in shopping malls or on the street, there is always a risk of connecting to a malicious network that could be used to steal your data. Therefore, if you are not sure about the security of the network, it is better not to connect to it.
Now that you know how to find and connect to Wi-Fi on your computer, you can enjoy a fast and wireless Internet connection anywhere.
How to connect to Wi-Fi on a computer
To connect to Wi-Fi on your computer, follow these simple steps:
1. Tap the Wi-Fi icon in the bottom right corner of the screen. If the icon doesn't appear, check whether Wi-Fi is turned on on your computer.
2. Select a Wi-Fi network from the list of available networks. If the network is password protected, enter the password.
3. Wait a few seconds for the computer to connect to the network. When the connection is established, the Wi-Fi icon will turn blue.
Now you can surf the Internet on your computer via Wi-Fi. If you can't connect to the network, try restarting your computer and trying again. If the problem persists, contact support.
Step 5: Check your connection
Once you have successfully connected to a Wi-Fi network, you need to make sure that the connection actually works. To do this, you can open any browser and try to access any site. If the page loads, then everything is fine, you have successfully connected to the Internet via Wi-Fi.
If the page does not load, you need to check your connection settings. Make sure you have entered the correct Wi-Fi password and that the signal is strong enough to connect. If all the settings are correct, then there may be a problem with the network. Contact your network administrator or Internet service provider to resolve the problem.
Don't forget that the Wi-Fi network can sometimes be slow. This may be due to many factors, such as the number of devices connected to the network, distance from the router, etc. If you experience slow Wi-Fi, try rebooting your router or reducing the number of connected devices.
Properly connecting to the Wi-Fi network on your computer is an important step to access the Internet. Follow our simple steps and you can successfully connect to a Wi-Fi network anywhere.
How to check your Wi-Fi connection on your computer
To make sure your computer's Wi-Fi is connected correctly, you need to follow a few simple steps. First, check that your computer is connected to a Wi-Fi network. To do this, you need to click on the Wi-Fi icon located in the lower right corner of the screen. If the icon has a check mark, it means you are connected to the network.
Secondly, check that you have Internet access. To do this, open any browser and try to load any page. If the page has loaded, then you have access to the Internet.
If you can't connect to your Wi-Fi network, try restarting your computer and router. If this does not help, contact your Internet service provider or technical support specialist.
Checking your computer's Wi-Fi connection is a very important step to ensure that you always remain connected to the Internet and can freely work or have fun in the online world.
Tips for successfully connecting to Wi-Fi
Connecting to Wi-Fi can be very simple, but there are a few things to keep in mind to avoid potential problems. Here are some tips to help you connect to Wi-Fi successfully:
1. Make sure your computer is within Wi-Fi coverage. If you are too far from your router, the signal may not be strong enough to connect.
2. Check your Wi-Fi login details. You may need to enter the correct username and password to connect.
3. Check that you are using the correct security protocol. Some Wi-Fi networks may use different protocols such as WEP, WPA or WPA2.
4. If you can't connect to your Wi-Fi network, try restarting your modem and router. Sometimes this can help resolve possible connection issues.
5. If you still cannot connect to Wi-Fi, try contacting your ISP technical support. They can help you troubleshoot any connection issues.
By following these simple tips, you can successfully connect to Wi-Fi and enjoy a fast and reliable Internet connection on your computer.
Read further:


