- Step by step: setting up the Internet on Windows 7
- How to connect to a Wi-Fi network on Windows 7
- Checking the availability and installing drivers for the network card
- How to configure network settings for connecting to the Internet
- Solving Internet connection problems on Windows 7
- How to set up mobile Internet on Windows 7
- Tips for setting up the Internet to improve speed and stability
Step by step: setting up the Internet on Windows 7
If you just purchased a computer or are upgrading to Windows 7, then you need to set up an Internet connection. In this article we will talk about how to set up the Internet on Windows 7. Step 1. Connect to the network Before setting up the Internet on Windows 7, make sure that your computer is connected to the network. If you have a wired connection, connect it to your computer and router. If you have a wireless connection, turn on Wi-Fi and connect to an available network. Step 2: Open Network and Sharing Center Click on the network icon in the lower right corner of the screen and select Open Network and Sharing Center. Step 3. Create a new connection In the Network and Sharing Center, select Set up a new connection or network and follow the on-screen instructions. Step 4: Select a connection type Select the connection type you want to set up. If you are using a wired connection, select Internet Connection. If you are using a wireless connection, select "Wireless Internet Connection". Step 5: Enter data Enter the information required to connect to the Internet, such as username and password. If you do not have this data, contact your ISP.Step 6. Complete the setup Click on the “Finish” button to complete the Internet setup on Windows 7. Now you can enjoy fast and stable Internet on your Windows 7 computer.
How to connect to a Wi-Fi network on Windows 7
Wi-Fi connection is the most common way to connect to the Internet these days. To set up Wi-Fi on Windows 7, follow the simple instructions below.
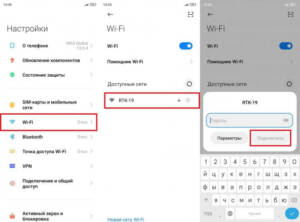
1. Click the Wi-Fi icon in the lower right corner of the screen.
2. Select the name of the Wi-Fi network you want to connect to and click the 'Connect' button.
3. Enter the password if the network has password protection and click the 'OK' button.
4. If you cannot find the desired Wi-Fi network in the list, click the 'Refresh' button to update the list.
5. If you still can't find the Wi-Fi network you need, make sure your computer is within the network's coverage area.
6. If these steps do not help, try restarting your computer and trying to connect again.
Now you are ready to use Wi-Fi on Windows 7! Be sure to check your connection speed to ensure you are getting maximum performance.
Checking the availability and installing drivers for the network card
In order to successfully set up the Internet on Windows 7, you need to check for and install drivers for your network card. Drivers are special programs that allow the operating system to work with your computer's hardware.
To check the availability of drivers for the network card, you need to go to 'Device Manager'. This can be done by pressing the 'Win' and 'R' keys at the same time, typing 'devmgmt.
msc' in the 'Run' field and click 'OK'.
In the 'Device Manager' window that opens, find the 'Network adapters' section. If your network card is displayed here, then the drivers are installed. If not, then the drivers are not installed or installed incorrectly.
To install drivers for a network card, you need to go to the website of the manufacturer of your computer or network card, find the required driver and download it. After the driver has been downloaded to your computer, you need to run it and follow the installer's instructions.
After installing the drivers for the network card, you need to restart the computer.
Now that the drivers are installed, you can start setting up the Internet on Windows 7.
How to configure network settings for connecting to the Internet
Before you start setting up the Internet on your Windows 7 computer, you need to make sure that you have a working Internet connection. To do this, you can use any device that is connected to the network, for example, a smartphone or tablet.
Go to the Start menu and select Control Panel. Then select "Network and Internet" and go to the "Network and Sharing" section.
Select "Change adapter settings." In the window that opens, you will see a list of available network adapters. Select the one you use to access the Internet.
Right-click on the selected adapter and select Properties. In the window that opens, select the IPv4 protocol and click the “Properties” button.
Set the options to obtain the IP address and DNS server automatically if you receive them from your ISP. If you are using a static IP address, enter the appropriate values in the fields.
Once you have configured your network settings, click OK. After this, you should be able to access the Internet again.
Be sure to restart your computer after configuring your network settings for the changes to take effect.
Solving Internet connection problems on Windows 7
Windows 7 is one of the most popular operating systems in the world. However, users may encounter problems connecting to the Internet. In this article, we will look at several ways to solve Internet connection problems on Windows 7.
1. Check your network connection. Make sure your computer is connected to the network and the Ethernet or Wi-Fi cable is connected to your router or modem.
2. Restart your computer and router/modem. Sometimes, a simple restart can solve your internet connection problem.
3. Check your network settings. Make sure your computer is configured to obtain an IP address and DNS server automatically.
4. Use network diagnostic tools. Windows 7 has a built-in network diagnostic tool that can help you identify the problem and suggest a solution.
5. Check for viruses. Some viruses can block access to the Internet. Make sure your computer is protected from viruses and check for viruses.
We hope these tips help you resolve Internet connection issues on Windows 7. If the problem persists, contact an IT professional for further assistance.
How to set up mobile Internet on Windows 7
If you want to connect to mobile internet on your Windows 7 device, it's easy to do. First of all, make sure that you have a mobile internet subscription and that the device you plan to use supports this feature.
Then open the Start menu and select Control Panel. Then select "Network and Internet" and then "Network Connections".
Right-click on the Mobile Broadband icon and select Properties. You will be prompted to select “Internet Protocol Version 4 (TCP/IPv4)” and click the “Properties” button.
Then select "Use the following IP address" and enter the IP address you received from your mobile internet provider. Then enter the gateway address and subnet mask.
Click "OK" to save the settings and you are ready to use mobile internet on your Windows 7 device.
Tips for setting up the Internet to improve speed and stability
If you want to get the best performance from your Internet connection, you need to configure your operating system correctly. Below are some tips to help you tweak your system for improved speed and stability.
1. Update your network card drivers
Make sure you have the latest drivers for your network card. This can significantly improve your network performance and Internet speed.
2. Change DNS servers
DNS servers translate domain names into IP addresses and are one of the main factors affecting your Internet speed. Try changing your DNS servers to faster and more reliable ones.
3. Turn off automatic Windows updates
Windows automatic updates can slow down your network, so disable it if you don't use this feature.
4. Clear DNS cache
Clear your DNS cache to get rid of unnecessary information that can slow down your network.
5. Disable programs that may be using your network
If you have programs that use your network, disable them to speed up your Internet connection.
Properly configuring your operating system can greatly improve the speed and stability of your Internet connection. Follow these tips and enjoy fast and stable Internet performance.
Read further:


